Managing your professional email is easy with cPanel. This guide will show you how to create a new email account step by step.
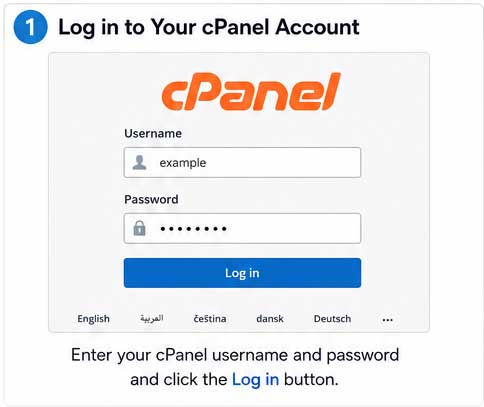
Step 1: Log in to Your cPanel Account
First, open your web browser and log in to your cPanel account using the username and password provided by your hosting provider.
Example URL:
https://yourdomain.com:2083or
https://cpanel.yourdomain.comAfter logging in, you will see the cPanel dashboard.
Step 2: Open the Email Accounts Section
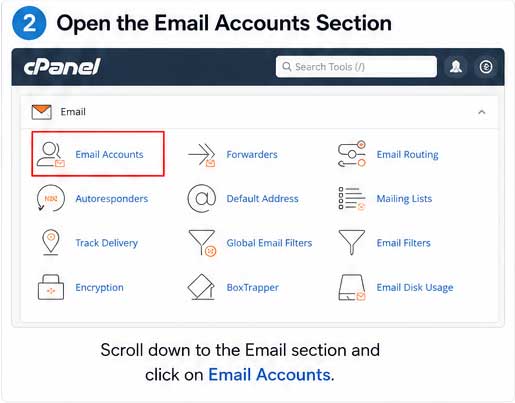
On the cPanel home page:
- Scroll down to the Email section.
- Click Email Accounts.
This is where you can create, manage, and delete email accounts.
Step 3: Click the "Create" Button
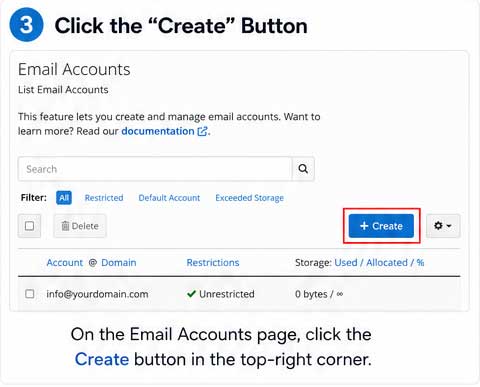
Inside the Email Accounts page:
Click the Create button located in the top-right corner.
This opens the form for creating a new email account.
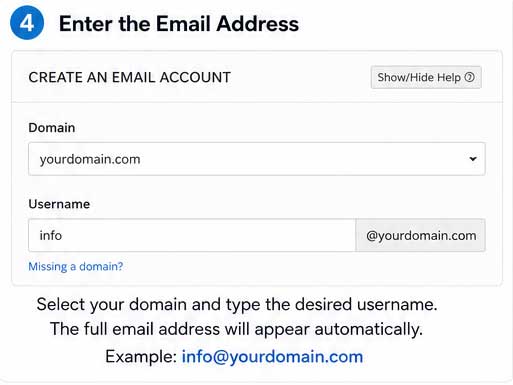
Step 4: Enter the Email Address
Fill in the required information:
- Domain: Select your domain (if multiple domains are available).
- Username: Enter the name you want before the @ symbol.
- Example:
info
- Example:
-
The complete email address will become:
Step 5: Create a Secure Password
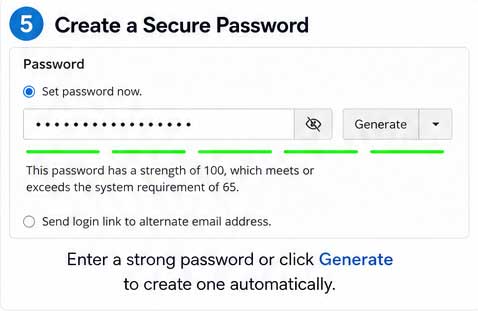
In the Password section:
- Enter a strong password.
- Or click Generate to automatically create a secure password.
A strong password should include:
- Uppercase letters
- Lowercase letters
- Numbers
- Special characters
Tip: Save your password in a safe place.
Step 6: Set Storage Space (Optional)
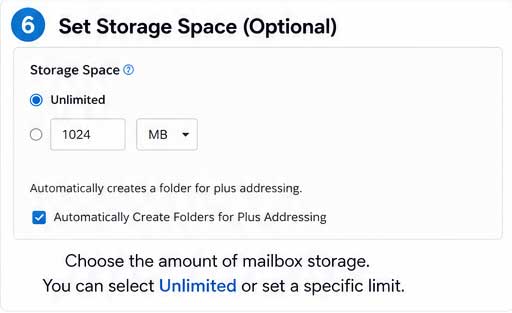
You can choose how much mailbox storage the email account can use.
Options include:
- A specific storage limit (such as 500 MB, 1 GB, or 5 GB)
Step 7: Click Create
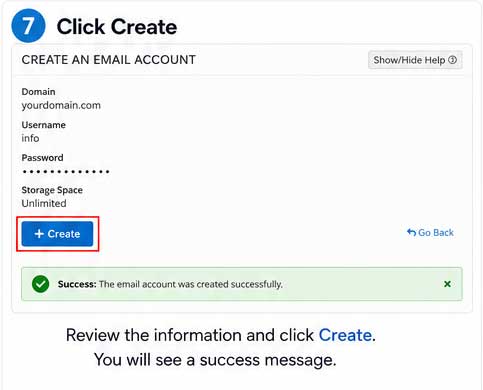
After reviewing the information, click the Create button.
Your new email account will be created instantly.
A success message will appear confirming the email account has been created.
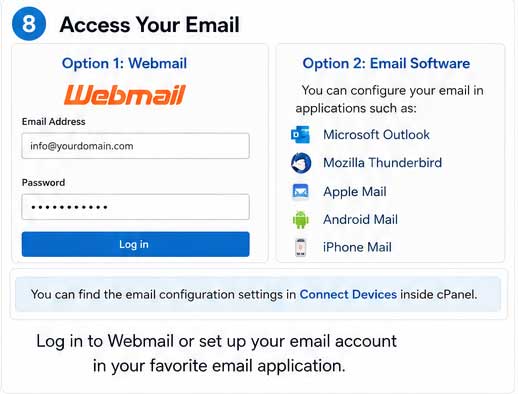
Step 8: Access Your Email
You can now access your email account in several ways.
Webmail
Visit:
https://yourdomain.com/webmailor
https://yourdomain.com:2096Log in using:
- Email Address
- Password